Connect your notebook
-
Open OneNote 2016 or 2013.
-
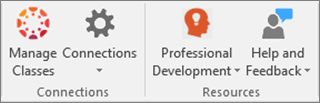
Select Class Notebook, then select Connections > Connections.
-
Select your LMS or SIS from the list in the Manage Connections window.
-
Enter your LMS or SIS homepage and select Sign In. Some systems may ask you for an app key and ID. If you don’t know yours, check with your IT professional.
-
Use your regular LMS/SIS log-in information when asked.
-
Select Authorize. It may take a moment for the connection to complete.
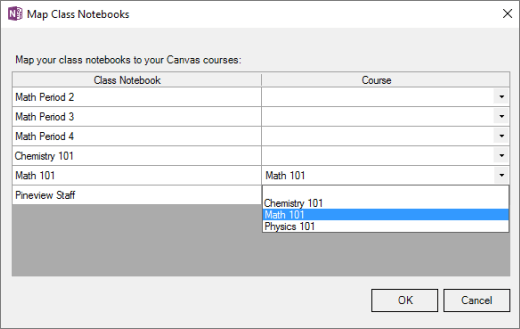
Mapping notebooks to your LMS or SIS course
After you connect Class Notebook to your LMS/SIS, matching notebook and course names will sync automatically. Use the Map tool to sync notebooks and courses with differing names.
-
Select Connections in the Class Notebook ribbon.
-
Select Map Class Notebooks. Use the drop-down menus to match each class notebook to your LMS/SIS course. For example: Match the Math 101 Class Notebook with Math 101.
-
Select OK.
Now, when you create or grade assignments in this notebook, they will sync with your course in LMS/SIS.
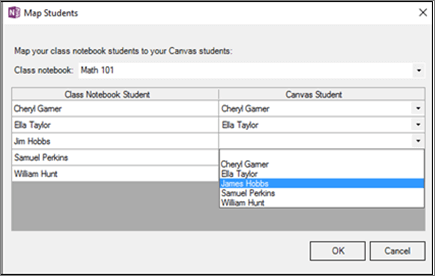
Mapping students to your LMS or SIS course
Use this tool to match student names between programs and ensure that their grades and assignments sync correctly. For example: A student is listed in your LMS/SIS course roster as James Hobbs, but recorded as Jim Hobbs in your Class Notebook.
-
Select Connections in the Class Notebook ribbon.
-
Select Map Students and the class notebook you need to map.
-
Use the drop-down menus to match each student in your class notebook with the correct name in your LMS/SIS course. For example: Match James Hobbs to Jim Hobbs.
-
Select OK.