Organize flowchart information into functional divisions with swimlanes.
Add swimlanes to a flowchart
-
From the CROSS-FUNCTIONAL FLOWCHART shapes stencil, select More Shapes > Flowchart.
-
Drag a Swimlane shape onto the drawing page.
Drag another swimlane shape near the first one, releasing it when you see the connection indicator.
Change the title of a swimlane
-
Double-click the swimlane label and type a new one in.
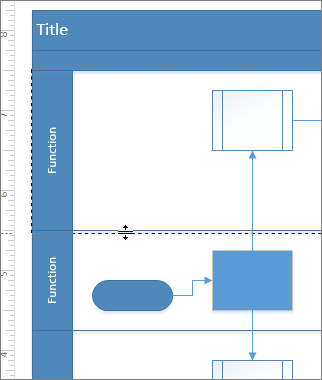
Change the size or position of a swimlane
-
To change the width of a swimlane, drag a separator line.
-
To change the length of a swimlane, drag the end line.
-
To move a swimlane and the shapes it contains, select the label and drag the swimlane to another location, and then release it when you see the connection indicator.
-
To delete a swimlane, select it and press Delete.
Source: Microsoft