View summary information for your quiz
After you create your quiz, adjust its settings, and share it with others, it’s time to view the results. In Microsoft Forms, open the quiz for which you want to review the results, and then click the Responses tab.
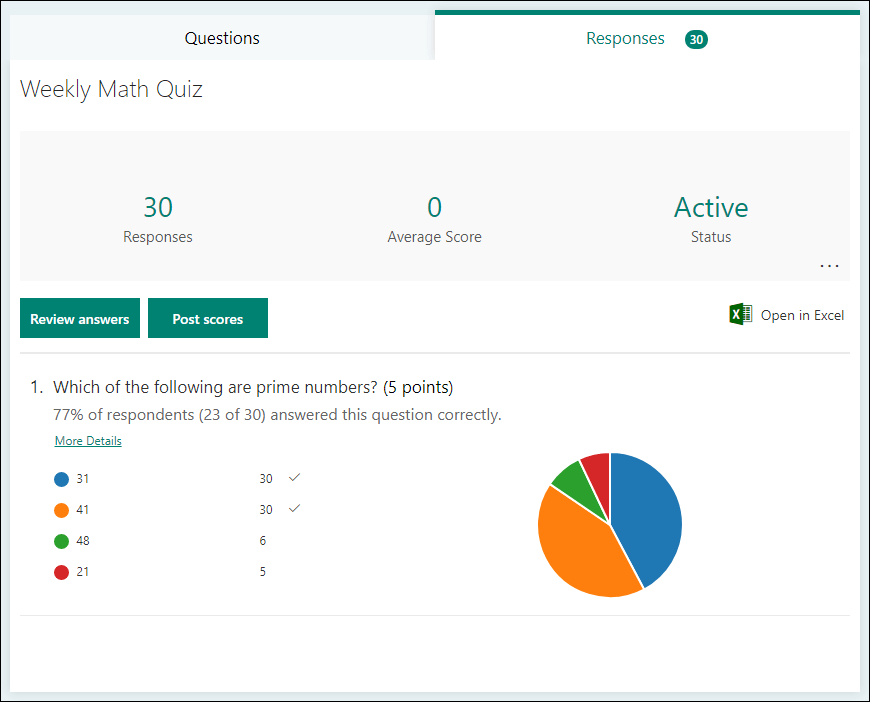
Across the top, you’ll see real-time summary information about your quiz, such as number of responses, average score, and quiz's current status.
Next to each question, you’ll see the number of responses and a colorful chart that shows the distribution of responses across all of the possible answers.
1. Review answers for each question
Click Review Answers to provide points and feedback.
On the People tab, you can see individual details for each student, such as time it took to complete your quiz, number of points earned, and the option(s) your student selected.
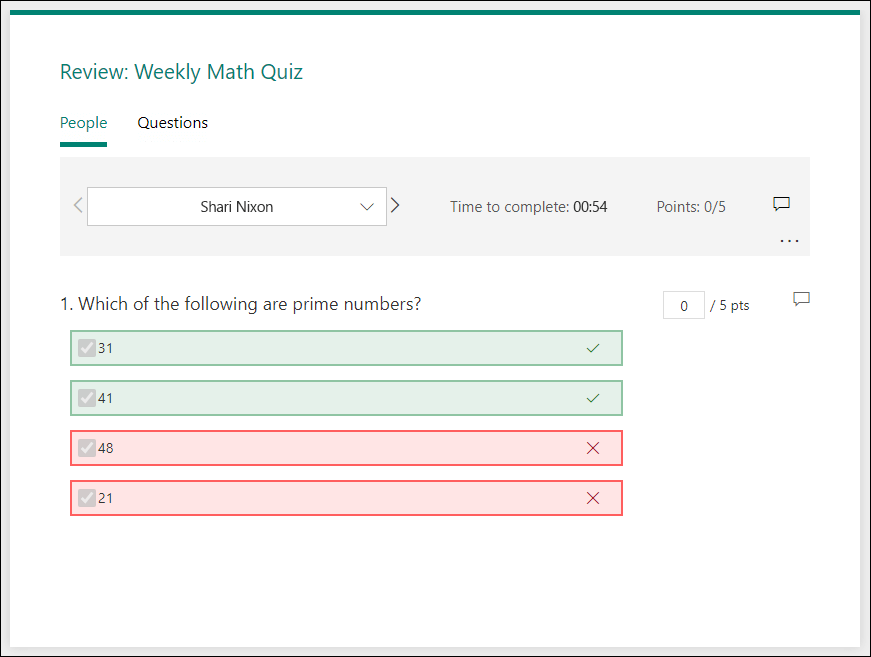
In this view, you can grade all questions for one student, then do the same for subsequent students. Click the arrow next to a student's name to jump to the results of another student. You can also click the left and right arrows to toggle through the result details of the other students.
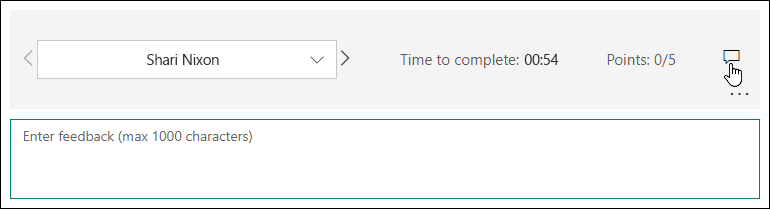
To provide general feedback for a student, click the feedback icon  and enter feedback in the text box.
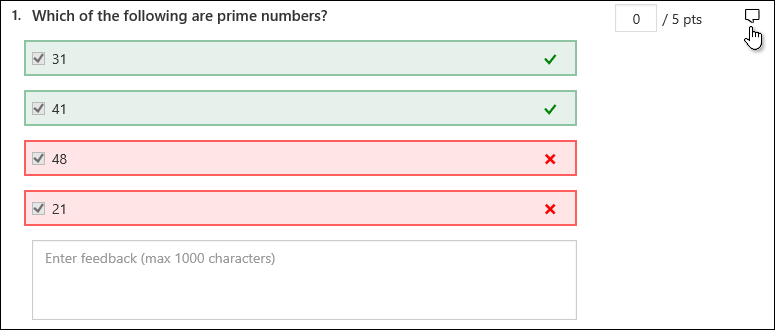
To provide feedback for a particular question, click the feedback icon to the right of points, and then enter feedback in the text box.
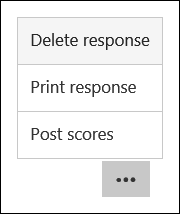
Click the ellipses button (...) to delete all responses for a particular student, print all responses for a particular student, or post scores.
Learn more about printing forms.
Note: Deleting a response cannot be undone.
2. Post scores
When you're ready to share your feedback and points to students, click Post scores in the Responses tab.
For each student, you can see the status of his or her quiz (e.g. graded) and number of points earned. If you want to post the scores of all students, click the check box to the left of Name in the Name column. To post individual scores, click the checkbox to the left of each student's name.
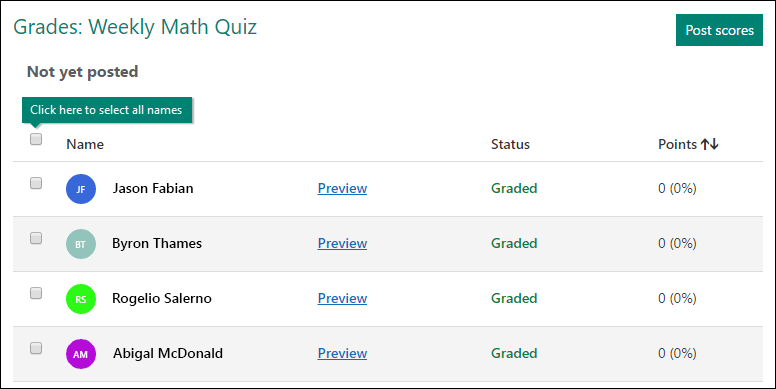
Click Post scores.
Once you post scores, you can go back to your quiz to review your results and feedback. Students can view their scores and feedback by launching the form.
Analyze your quiz results in Excel
You can easily view all of the response data for your quiz in Microsoft Excel. Click Open in Excel on the Responses tab.
Each question in your quiz is a column and each response becomes a row in the Excel workbook. The first four columns display the start time and completion times for each response, and the email address and name for each student. The subsequent columns display total points, quiz feedback, grade posted time, quiz questions, points for individual questions, and feedback for individual questions.

Source: Microsoft