Build the entity
-
Sign in to powerapps.com.
-
If the left navigation bar doesn't appear by default, click or tap the icon with three horizontal lines in the upper-left corner.

-
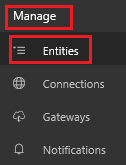
In the left navigation bar, click or tap Manage, and then click or tap Entities.
-
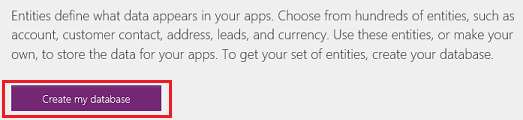
If prompted, click or tap Create my database.
-
Near the upper-right corner, click or tap New entity.

If your browser window isn't maximized, this button might appear in a different place.
-
Under Entity name, specify a name that doesn't contain spaces and that no other entity in your database has.
To follow this example exactly, specify ReviewDropboxFiles.

-
Under Display name, specify a friendly name.

-
Click or tap Next.

Add fields to the entity
-
Near the upper-right corner, click or tap Add field.

-
In the blank row that appears at the bottom of the list of fields, set the properties of an Approver field. (As you set these properties, you can switch to the next column by pressing Tab.)
-
In the Display Name column, type Approver.
-
In the Name column, type ApproverEmail.
-
In the Type column, click or tap the Email option.
-
In the Required column, select the checkbox.

-
-
In the next row, set the properties of a Status field:
-
In the Display Name column, type Status.
-
In the Name column, type Status.
-
In the Type column, click or tap the Text option.
-
In the Properties column, leave the default value.
-
In the Required column, select the checkbox.

-
-
In the next row, set the properties of a FileID field:
-
In the Display Name column, type File identifier.
-
In the Name column, type FileID.
-
In the Type column, click or tap the Text option.
-
In the Properties column, leave the default value.
-
In the Unique column, select the checkbox.
-
In the Required column, select the checkbox.

-
-
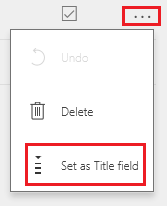
Near the right edge, click or tap the ellipsis (...) for the FileID field, and then click or tap Set as Title field.
-
Near the lower-left corner, click or tap Create.

-
(optional) When the list of entities reappears, maximize your browser window if it isn't already maximized, and then click or tap the Type column header. The list is sorted with the custom entities, such as the one you just created, appearing at the top.
Sign in and create a flow
-
Open the Microsoft Flow portal.
-
Maximize your browser window if it isn't already maximized, and then click or tap Sign in near the upper-right corner.

-
In the top right menu you select the environment that you created the database in powerapps.com.
Note: if you do not select the same environment then you will not see your entity.
-
Near the upper-left corner, click or tap My flows.

-
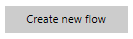
Near the upper-right corner, click or tap Create new flow.
Start when a file is added
-
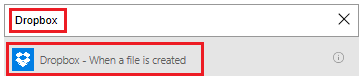
In the box that contains Search for more triggers, type or paste Dropbox, and then click or tap Dropbox - when a file is created.
-
Under Folder, click or tap the folder icon, and then browse to the folder where files will be added.

Add data to the entity
-
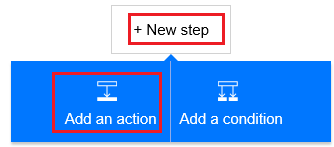
Click or tap New step, and then click or tap Add an action.
-
In the box that contains Search for more actions, type or paste Common Data Service, and then click or tap Common Data Service - Create object.

-
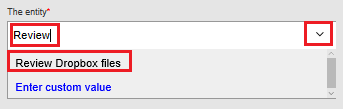
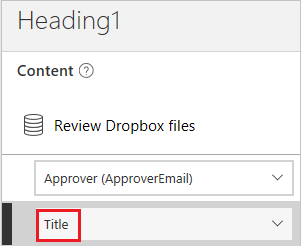
Under The entity, type or paste Review, and then click or tap Review Dropbox files.
-
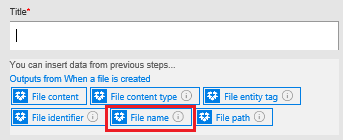
Under Title, click or tap in the box, and then click or tap File name in the list of parameter tokens to add that token to the field.
-
Under Approver, type or paste the email address of the person who will review the files.
Note: To make testing the flow easier, specify your own address. You can change it later, when the flow is ready for actual use.

-
Under Status, type or paste Pending.

-
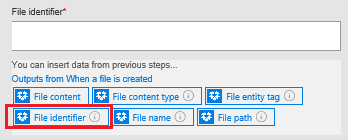
Under File Identifier, click or tap in the box, and then click or tap File identifier in the list of parameter tokens to add that token to the field.
Check whether the file has been reviewed
-
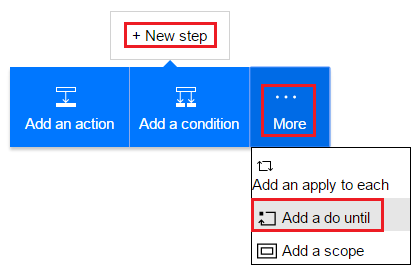
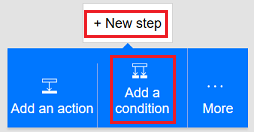
Under the Create object action, click or tap New step, click or tap More, and then click or tap Add a do until.
-
In the upper-left corner of the Do until action, click or tap in the box that contains Choose a value.

Note: If your browser window isn't maximized, click or tap in the upper box that contains Choose a value.
-
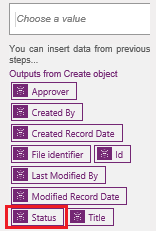
Under Outputs from Create object, click or tap Status to add that parameter token to the field.
-
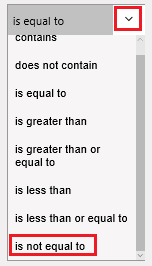
Open the list near the center of the Do until action, and then click or tap is not equal to.
-
In the upper-right corner of the Do until action, type or paste Pending in the box that contains Choose a value.

Note: If your browser window isn't maximized, click or tap in the lower box that contains Choose a value.
-
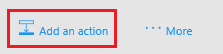
Near the bottom of the Do until action, click or tap Add an action.
-
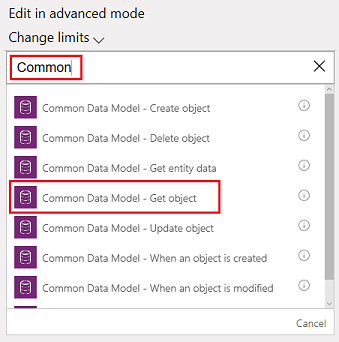
In the box that contains Search for more actions, type Common, and then click or tap Common Data Service - Get object.
-
Under The namespace, click or tap your database.
-
Under The entity, type or paste Review, and then click or tap Review Dropbox files.
-
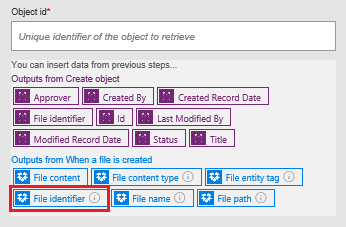
Under Object id, click or tap in the box, and then click or tap the File identifier parameter token to add it to the field.
Check whether the item has been approved
-
Under the Do-Until action, click or tap New step, and then click or tap Add a condition.
-
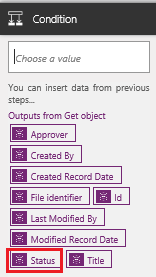
In the upper-left corner of the condition, click or tap in the box that contains Choose a value.

Note: If your browser window isn't maximized, click or tap in the upper box that contains Choose a value.
-
Under Outputs from Get object, click or tap the Status parameter token to add it to the field.
-
In the upper-right corner of the condition, type or paste Approved in the box that contains Choose a value.

Note: If your browser window isn't maximized, type or paste Approved in the lower box that contains Choose a value.
Send notification mail
-
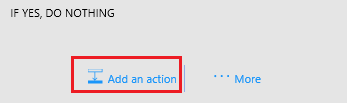
Under If yes, do nothing, click or tap Add an action.
-
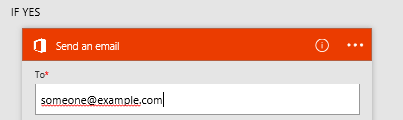
In the box that contains Search for more actions, type or paste send mail, and then click or tap Office 365 Outlook - Send an email.

-
Under To, type or paste the address of the person whom you want to notify when an item is accepted.
Note: To make testing the flow easier, specify your own address. You can change it when the flow is ready for actual use.
-
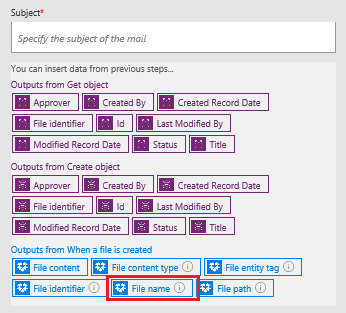
Under Subject, click or tap in the box, and then click or tap the File name parameter token to add it to the field.
-
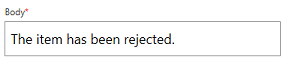
Under Body, type or paste The item has been approved.

-
Under If no, do nothing, repeat steps 1-5 in this procedure except specify the body of the email message as The item has been rejected.
Delete rejected files
-
Under the fields for the rejection mail, click or tap Add an action.
-
In the box that contains Search for more actions, type or paste Dropbox, and then click or tap Dropbox - Delete file.

-
Under File, click or tap in the box, and then click or tap the File identifier token parameter to add it to the field.

Save the flow
-
At the top of the screen, type or paste a name for the flow that you're creating, and then click or tap Create Flow.

-
Click or tap Close and then click or tap Done.
-
In Dropbox, add at least two files to the folder that you specified: one to test approval and one to test rejection.
Build the app
-
Sign in to powerapps.com, and then click or tap New app near the bottom of the left navigation bar.

-
In the dialog box that appears, click or tap the option to open either PowerApps Studio for Windows or PowerApps Studio for the web.
-
If you opened PowerApps Studio for Windows, click or tap New in the left navigation bar.
-
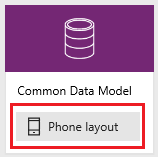
Under Create an app from your data, click or tap Phone layout in the Common Data Service tile.
-
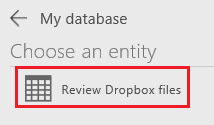
In the Search box, type or paste Review.

-
Under Choose an entity, click or tap Review Dropbox Files.
-
Near the lower-right corner, click or tap Connect.

-
If the opening screen of intro tour appears, take the tour to get familiar with PowerApps (or click or tap Skip).
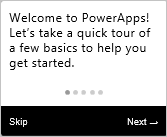
You can always take the tour later by clicking or tapping the question-mark icon near the upper-left corner and then clicking or tapping Take the intro tour.
-
(optional) Near the bottom of the screen, drag the slider to increase the zoom so the app is easier to see.

Customize the app
-
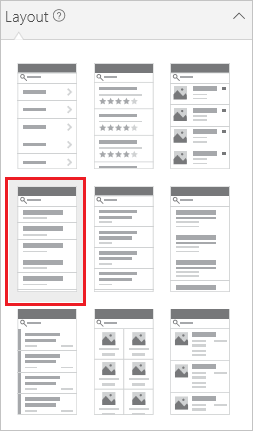
In the right navigation bar, click or tap the layout that includes a header and a description.
-
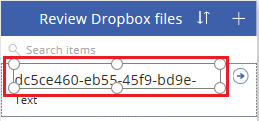
On the BrowseScreen, click or tap just under the search bar to select the larger text-box control.
-
In the right-hand pane, open the lower list by clicking or tapping its down arrow.
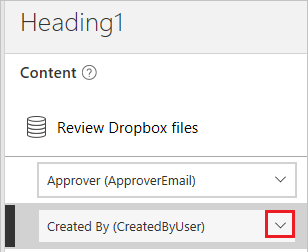
-
In the lower list, click or tap Title so show the file name of the added files.
-
In the right-hand pane, open the upper list, and then click or tap Status to show the status of each file.

Test the overall solution
-
In PowerApps, open Preview mode by clicking or tapping the play button near the upper-left corner.

-
For the first file in the list, click or tap the arrow to show details about that file.

-
In the upper-right corner, click or tap the pencil icon to change details about the file.

-
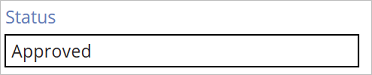
In the Status box, type or paste Approved.
-
In the upper-right corner, click or tap the checkmark icon to save your changes and return to the details screen.

In a few minutes, you'll receive email stating that the file was approved.
-
In the upper-right corner, click or tap the back button to return to the browse screen.

-
For the other file in the list, click or tap the arrow to show details about that file.
-
In the upper-right corner, click or tap the pencil icon to change details about the file.
-
In the Status box, type or paste Rejected (or anything except Approved, including Aproved or Approoved).

-
In the upper-right corner, click or tap the checkmark icon to save your changes and return to the details screen.
In a few minutes, you'll receive email stating that the file was rejected, and the file will be deleted from Dropbox.