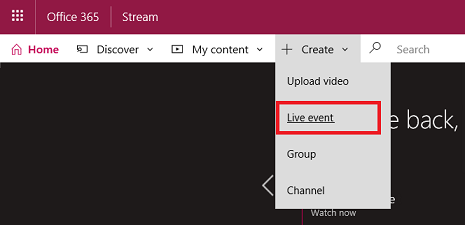
Schedule the live event
-
In Stream, go to Create > Live event.
-
Fill in the details pane with a name, description, and event time. You can also upload a thumbnail as a poster image for users to see.
Note that as you fill in information, an automatic slate will generate to let your users know information about the event before it starts.

-
Select the permissions pane and set who you want access to the video and which groups for it to be displayed in for increased discoverability.

-
Optionally you can set additional options in the Options pane. Most options will take effect when the event is complete after the transition from live to on demand.
-
Select Save. By selecting Publish now, those you have given access will be able to see the event page in the attendee view, but will be shown the automatically generated slate before you go live.
Note
You must publish in order to share the URL. If you didn't publish, the system will automatically publish your event when you are ready to go live and manually start your event. When the event is published, users can find the event throughout the Stream portal in browse, search and on group pages.
Stream your live event
-
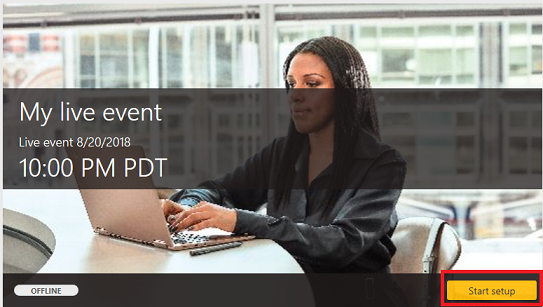
When you save your live event, you will get the RTMP server ingest URL located in the encoder setup tab. Select an encoder from the drop down list, or choose to configure manually. Check out the list of encoders for easy setup instructions.

-
To set up your encoder, select Start setup on the producer controls. It may take some time to start the setup process.
-
When the setup is ready, copy the server ingest URL into your encoder to start sending the live encoder feed to Microsoft Stream. Learn more about setting up your encoder
Note
It is important to set up your encoder with the correct configuration, and specify both audio and video for playback. Check out the configuration requirements to make sure you set up the encoder correctly.
-
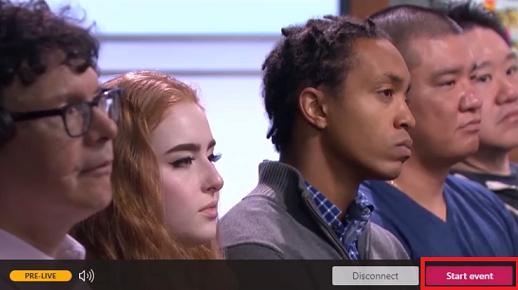
When you start pushing from the encoder to the server ingest point, you should see the producer preview update.
Note
Audience members won't see this until you start the live event - they will see the automatically generated slate.
-
After you are satisfied with your setup and can see the preview, select Start event. If you didn't previously publish your event, Stream will do so automatically when you start the event.
After the event starts, audience members can see the event.
Note
You can also choose to disconnect at this point, which will take you back to step #2 if your intent was to test before the event.
-
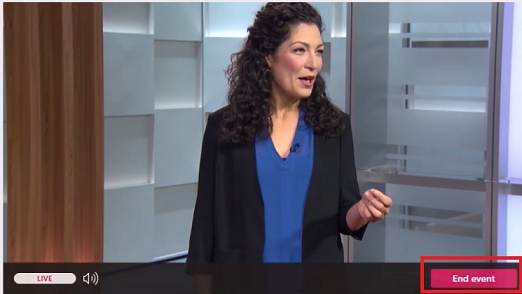
When you are finished with your event, select End event on the producer controls. This ends the event and makes the content immediately available for video-on-demand.
Important
Make sure to end the event in Stream before stopping your encoder. If you do this in reverse order, audience members will see an error.