Class Notebook is part of OneNote. Each one includes a Content Library for teachers to share course content, a Collaboration Space where teachers and students can work together, and a private notebook for each student. After a Class Notebook is created, teachers and students can access it from any device using the OneNote app.
First, sign in to Office.com with the log-in provided by your school.
Then, select Create a class notebook in the Class Notebook Wizard.
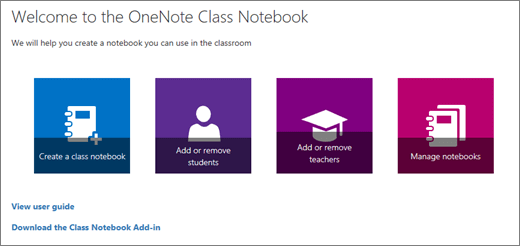
The Wizard will walk you through the following steps to set up your notebook:
-
Type a name for your notebook.

-
(Optional) Type in teacher’s name or email address to add additional teacher(s) from your school.
Note: Select Next to navigate between steps or to skip a step.
-
(Optional) Add students from your school by name, group name, or email address. Separate a list of students with semi-colons.
-
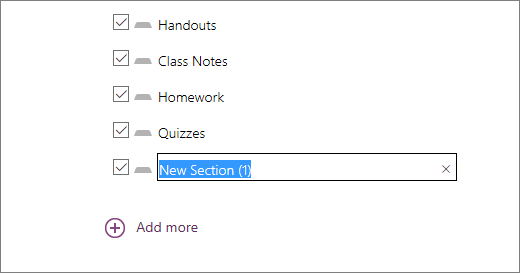
Customize the student sections you'll use to distribute and organize class materials for each student. For example: Homework, Quizzes, Handouts.
-
Preview the Teacher’s notebook and Student’s notebook views, then select Create to finalize.
Your notebook is ready! Use the link on this page to open your notebook in OneNote. The students and co-teachers you added will receive an email with a link to their notebooks.
Source: Microsoft