Add the student to their new notebook
-
Sign in to Office.com with the log-in provided by your school.
-
Select Class Notebook, then Add or remove students in the Class Notebook Wizard.
-
Select the notebook you're adding the student to.
-
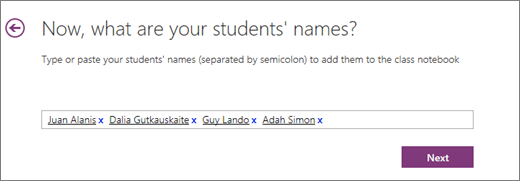
Type the student’s name and select Next, then Update.
Remove the student from their old class
-
While Class Notebook Wizard is still open, select the Back to Home link.
-
Select Add or remove students.
-
Select the notebook you’re removing the student from.
-
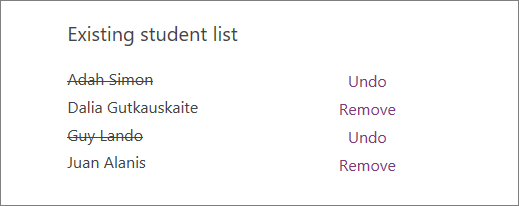
Select the student’s name and select Next, then Update.
Move the student’s private work from the previous notebook to the new notebook
-
Open OneNote and then open both Class Notebooks. For example: Algebra P1 and Algebra P2.
-
Right click on each section of the student’s private notebook that you need to move to your other class. For example: Homework, Quizzes, or Handouts.
-
Select Move or copy and then select the student’s name in the destination notebook. Select Move. Repeat this step for all the work you need to move.
Removing a student from a Class Notebook doesn't delete their private notebook from your class, even after you’ve moved work. To delete their work from their old class, right-click on the student’s name and select Delete.
Source: Microsoft